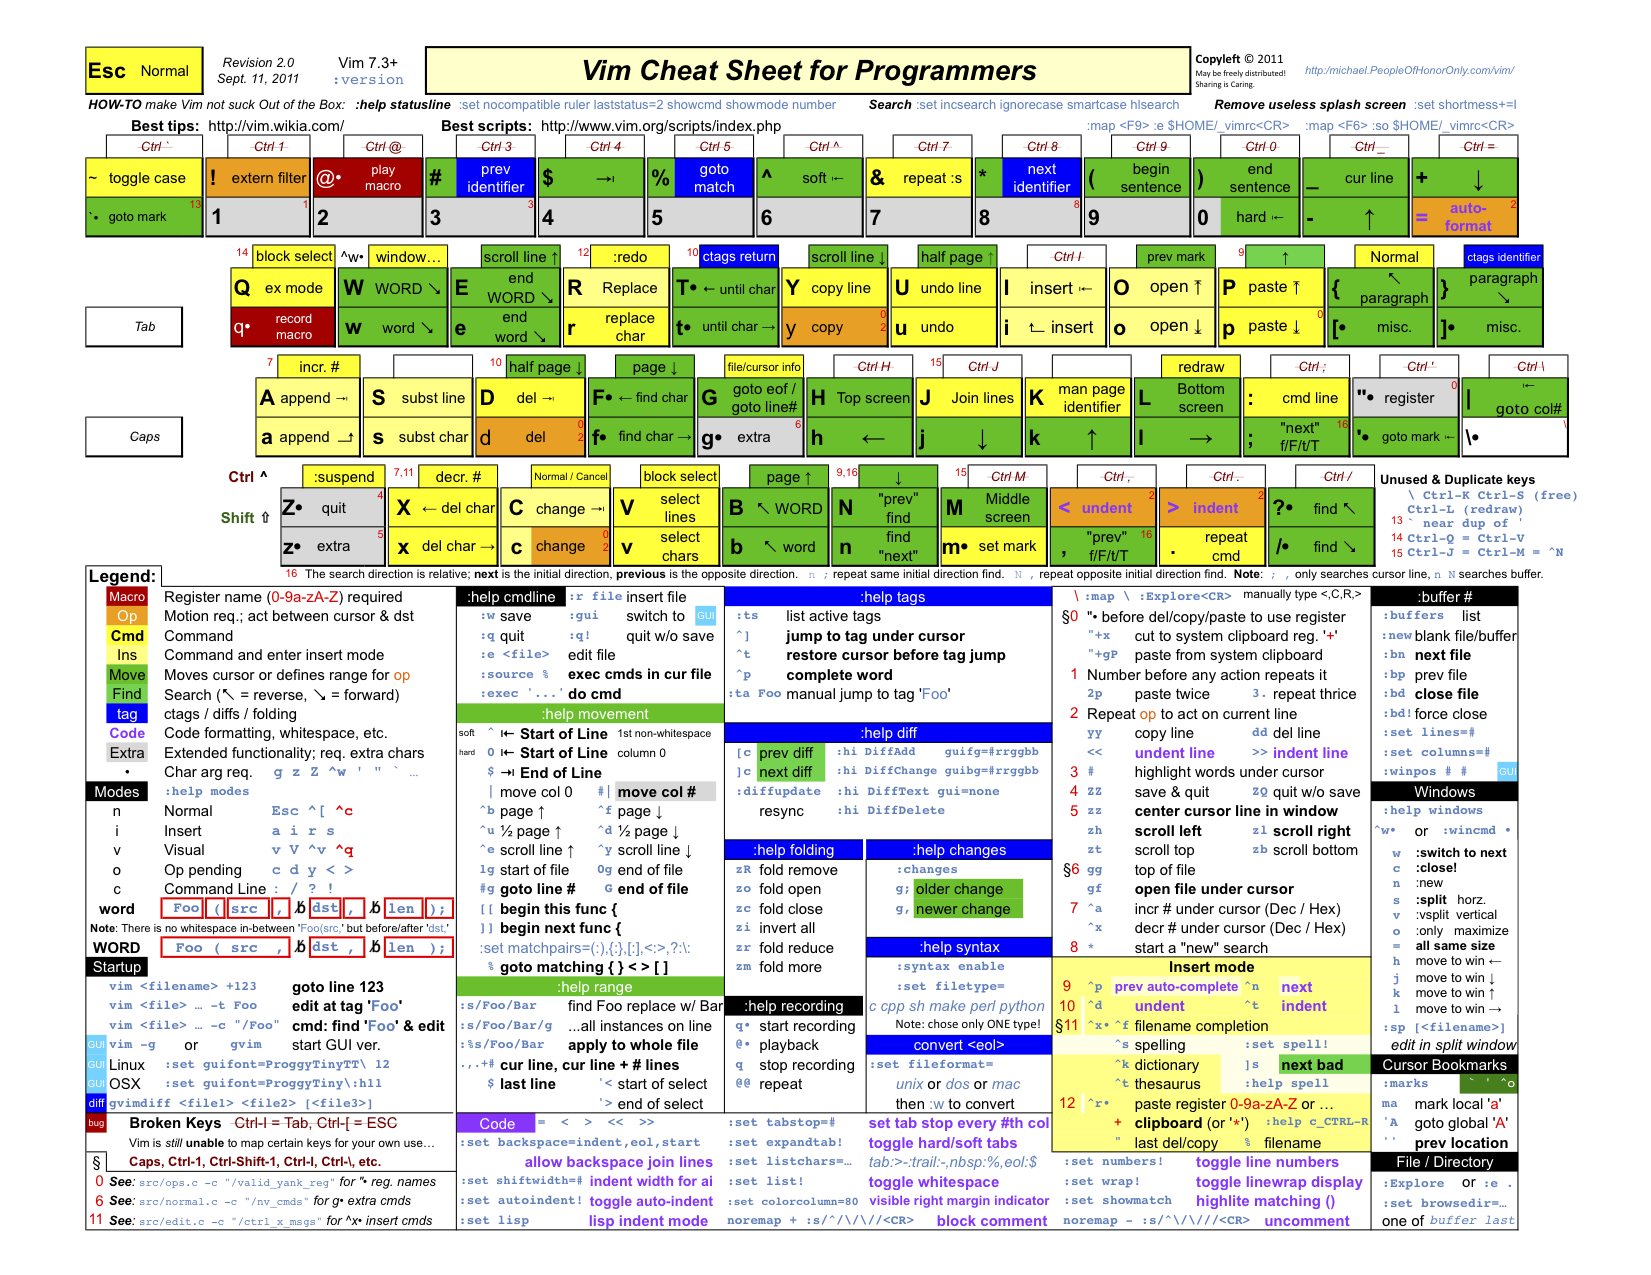
参考:
pc-----https://ftp.nluug.nl/pub/vim/pc/gvim81.exemac-----https://github.com/macvim-dev/macvim/releases$ brew install vim --with-cscope --with-lua --override-system-vim安装spf13-vim见下面linux部分。如果安装macvim,将上面的vim替换为macvim,然后执行 brew linkapps macvim linux-----https://github.com/vim/vim$ sudo apt-get remove --purge vim$ sudo apt-get autoclean$ sudo apt-get install python-dev python3-dev ruby-dev luajit liblua5.1-dev libluajit-5.1 libperl-dev libncurses5-dev$ sudo rm -rf /usr/local/share/vim$ sudo rm /usr/bin/vim$ sudo mkdir -p /usr/include/lua5.1/include$ sudo cp /usr/include/lua5.1/*.h /usr/include/lua5.1/include/$ cd ~$ git clone --depth 1 https://github.com/vim/vim.git$ cd ~/vim/src$ make distclean$ ./configure --with-features=huge \--enable-largefile \--enable-multibyte \--enable-perlinterp \--enable-rubyinterp \--enable-luainterp \--enable-python3interp \--with-python3-config-dir=/usr/lib/python3.5/config-3.5m-x86_64-linux-gnu \--with-luajit \--enable-fail-if-missing \--with-lua-prefix=/usr/include/lua5.1 \--enable-cscope \--enable-gui=auto注意:python3 和 python 同时给定,优先会使用python--enable-pythoninterp \--with-python-config-dir=/usr/lib/python2.7/config \$ make -j8$ sudo make install$ whereis vimvim: /usr/local/bin/vim /usr/share/man/man1/vim.1$ vim --version安装spf13-vim----vim-plugs版本----https://github.com/junegunn/vim-plug/wikicd ~pip3 install neovimcurl https://raw.githubusercontent.com/StarryLeo/starry-vim/master/bootstrap.sh -L > starry-vim.sh && sh starry-vim.sh或者sh <(curl https://raw.githubusercontent.com/StarryLeo/starry-vim/master/bootstrap.sh -L)添加go-vim插件echo "Plug 'fatih/vim-go', { 'do': ':GoUpdateBinaries' }" >> ~/.vimrc.plugs.localvim +PlugClean! +PlugInstall +q查看状态,清理错误的插件后再重新安装:PlugStatus:PlugClean:PlugInstall删除一个插件echo UnPlug 'scrooloose/syntastic' >> ~/.vimrc.plugs.local更新:cd ~/.starry-vim/git pullvim +PluginClean! +PlugInstall +q----原始Vundle版本----$ sudo apt-get install exuberant-ctags$ curl http://j.mp/spf13-vim3 -L -o - | sh或者$ curl https://raw.githubusercontent.com/spf13/spf13-vim/3.0/bootstrap.sh -L -o - | sh会出现amirh/HTML-AutoCloseTag错误(提示是登陆github),按Ctrl+w,jj跳过这个错误全部安装后$ vim ~/.vimrc.bundles找到amirh,替换为okayliao,保存退出后用下面命令重新安装一遍插件。$ vim +BundleInstall! +BundleClean +q快捷键:开启行号(简写nu):set number开启相对行号(简写rnu):set relativenumber向上移动相对8行:g.8k向下移动相对8行:g.8j向下删除到相对4行:d4j重复上个命令:.浏览旧文件(简写bro old):browse oldfile最近编辑过的文件('0~'9)'0切换TAB[num]gt切换缓冲(简写b ):buffer 打开NERD_Tree目录树:C-e或者,e查找文件打开:C-p注释:,cc跳转:,,fa ,,bSurroundhttps://github.com/tpope/vim-surround/blob/master/doc/surround.txtOld text Command New text Comment"Hello *world!" ds" Hello world! 删除双引号[123+4*56]/2 cs]) (123+456)/2 改变[]为(),如果用左括号将使括号内插入空白间隙"Look ma, I'm *HTML!" cs" Look ma, I'm HTML!
改变双引号为html标记,改变回来可用cst"if *x>3 { ysW( if ( x>3 ) { iw是一个文本对象,t是tag,W是空白my $str = *whee!; vllllS' my $str = 'whee!'; S是选中范围支持repeat.vim的命令(.重复命令):ds(删除)、cs(改变)和yss(整行)开启行号、关闭拼写检查、自动折叠、行号显示、调整字体大小vim ~/.vimrc.local内容开始set number relativenumberset nospellset nofoldenablelet g:DisableAutoPHPFolding = 1if has('gui_running') set guioptions-=T " Remove the toolbar set lines=40 " 40 lines of text instead of 24 if !exists("g:starry_no_big_font") if LINUX() && has("gui_running") set guifont=Consolas-with-Yahei:h12 elseif OSX() && has("gui_running") set guifont=Andale\ Mono\ Regular:h14,Menlo\ Regular:h13,Consolas\ Regular:h14,Courier\ New\ Regular:h16 elseif WINDOWS() && has("gui_running") set guifont=Consolas-with-Yahei:h10.5 endif endifelse if &term == 'xterm' || &term == 'screen' set t_Co=256 " Enable 256 colors to stop the CSApprox warning and make xterm vim shine endif "set term=builtin_ansi " Make arrow and other keys workendif内容结束备份:TARGET=$HOME/Desktop/vimrc.tar.xzcd ~ && rm -rf $TARGET && tar cvJfp ~/Desktop/vimrc.tar.xz .starry-vim/ .vim/ .vimrc.local .vimrc.plugs.local starry-vim.shunset TARGET在桌面生成vimrc.tar.xz文件恢复:TARGET=$HOMEmkdir -p $TARGETtar xvJf ~/Desktop/vimrc.tar.xz -C $TARGETln -s $TARGET/.starry-vim/.vimrc $TARGET/.vimrcln -s $TARGET/.starry-vim/.vimrc.before $TARGET/.vimrc.beforeln -s $TARGET/.starry-vim/.vimrc.plugs $TARGET/.vimrc.plugssudo chmod 755 $TARGET/.vimrc{,.before,.plugs}unset TARGET
图片:

打印和高清版本,请访问: